How to Send Personalized Skills Feedback to Participants
Print
Modified on: Thu, Aug 13, 2020 at 5:06 PM
Before You Begin
- Microsoft Excel, Microsoft Word, and Microsoft Outlook are installed on your computer.
- Microsoft Outlook is your default app for emails.
- An instructor sends you an Excel roster listing the program participants and three skills for each participant.
- The Dropbox desktop app is installed on your computer, you are signed in to your Communispond Dropbox account, and the Dropbox app is synced with the Dropbox cloud.
- You have access to the Personalized Skills Feedback folder on Communipsond's Dropbox.
- You received the Dropbox URL for the participant videos recorded during the program.
Create a Program Folder
- In Windows Explorer, navigate to C:\Users\Your Name\Dropbox (Communispond)\Personalized Skills Feedback.

- Create a new folder with the program number, program acronym, and client.
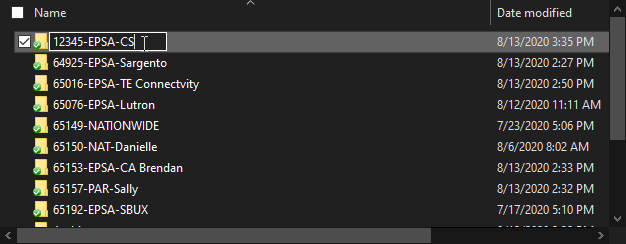
- Save or move the Excel roster that the instructor sent you to the folder you created.
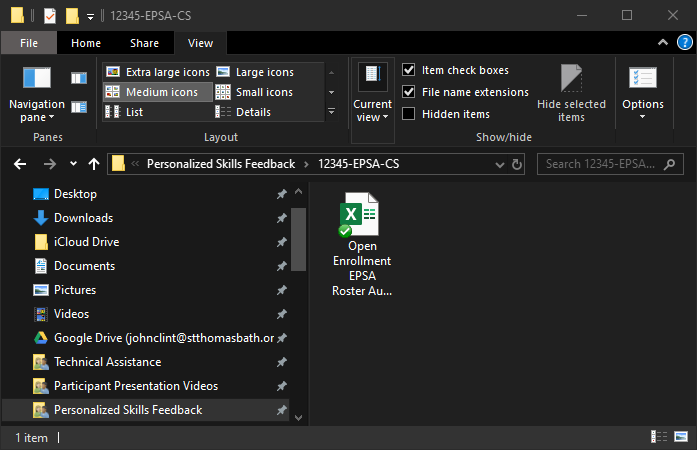
- In Windows Explorer, go up one level to C:\Users\Your Name\Dropbox (Communispond)\Personalized Skills Feedback.
- Open Personalized Skills Feedback Spreadsheet.xlsx.

- Notice that the spreadsheet opens as a read-only file.

- Save a copy of the spreadsheet to the folder you created.
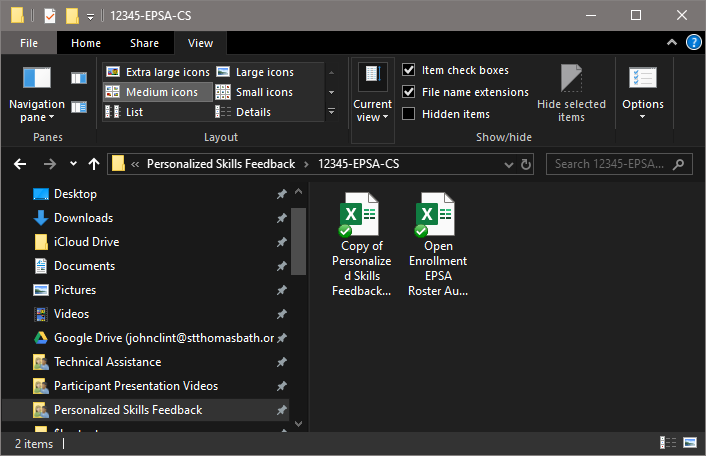
- In Windows Explorer, go up one level to C:\Users\Your Name\Dropbox (Communispond)\Personalized Skills Feedback.
- Open Personalized Skills Feedback Email Merge Document.docx.

- In the Microsoft Word dialog box, select No.

- Notice that the document opens as a read-only file.

- Save a copy of the document to the folder you created.

Prepare the Data Spreadsheet
Update from here down.
- Open the roster that the instructor sent you.

- In the program folder you created, open Copy of Personalized Skills Feedback Spreadsheet.xlsx.

- At the bottom of the Tips for Feedback.EPSA.DMPA.xlsx spreadsheet, select the correct sheet for the program—Entry Form - EPSA or Entry Form - DMPA. (Ignore Tips EPSA or Tips DMPA.)

- To make the next steps easier, snap the roster to the left side of the screen and the other spreadsheet to the right side of the screen.

- On the right side of the screen, delete the example information in cells A2 through F12. Take care not to delete the column headers or the formulas in the F1, F2, and F3 columns. Don't be concerned about the #N/A values in the F1, F2, and F3 columns.

- On the left side of the screen, copy the cells that contain the participants' First Name, Last Name, and Email. (Use CTRL + C or Right-click ➡ Copy).
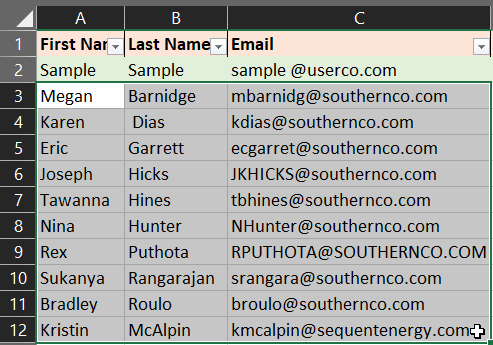
- On the right side of the screen, select cell A2 and paste the data from the clipboard into the spreadsheet. (Use CTRL + V or Right-click ➡ Paste).

- On the left side of the screen, in the row for the first participant, find the three numbers in the Personalized Skills Feedback column.

- On the right side of the screen, in the row for the first participant, put your cursor in the cell in the Tip 1 column, select the down arrowhead adjacent to the cell, and select the dropdown option that corresponds to the first number on the left side of the screen.
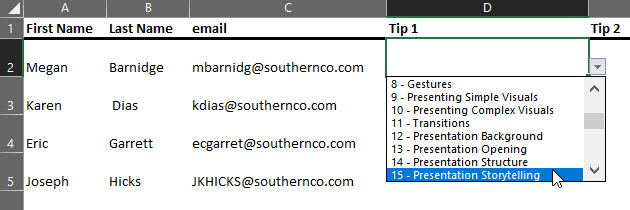
- On the right side of the screen, in the row for the first participant, put your cursor in the cell in the Tip 2 column, select the down arrowhead adjacent to the cell, and select the dropdown option that corresponds to the second number on the left side of the screen.

- On the right side of the screen, in the row for the first participant, put your cursor in the cell in the Tip 3 column, select the down arrowhead adjacent to the cell, and select the dropdown option that corresponds to the third number on the left side of the screen.

- On the right side of the screen, notice that Excel automatically populated the cells under the F1, F2, and F3 columns for the first participant.

- Repeat steps 8-11 for the remaining participants.
- If you have any rows that contain #N/A but do not contain a participant's First Name, Last Name, and Email, select those rows and delete them (Delete or Right-click ➡ Delete).

- Save the spreadsheet on the right side of the screen and close it.
- Close the spreadsheet on the left side of the screen.
Prepare the Mailmerge Document
- In Windows Explorer, navigate to C:\Users\Your Name\Dropbox (Communispond)\Personalized Skills Feedback.
- Open Personalized Skills Feedback (email merge version).docx.

- In the Microsoft Word dialog box, select No.

- Notice that Microsoft Word opened Personalized Skills Feedback (email merge version).docx and populated the merge fields with data from its last usage.

- Change the Dropbox URL to the correct one for the participant videos recorded during the program.
- In Microsoft Word, in the menu, select Mailings.

- In the ribbon, select Select Recipients ➡ Use an Existing List.

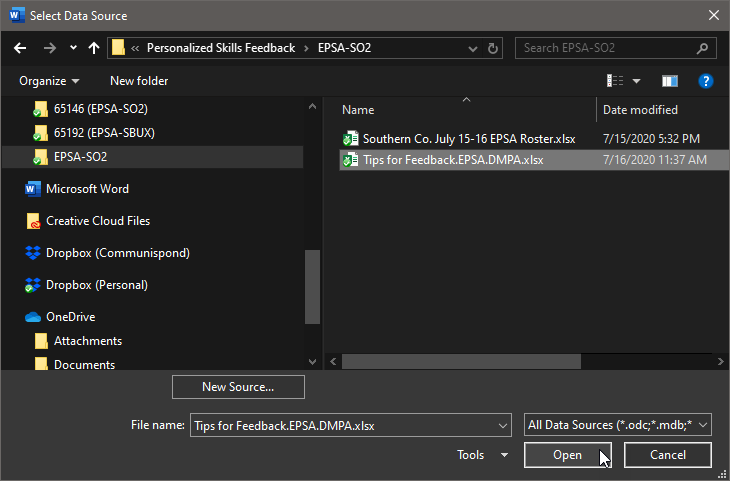
- Navigate to the program folder you created earlier, select Tips for Feedback.EPSA.DMPA.xlsx, and select Open.
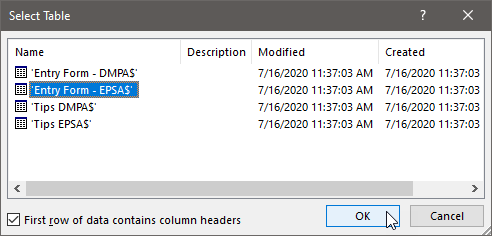
- In the Select Table dialog box, select the correct Entry Form sheet for the program and select OK.
- Notice that Microsoft Word populated the merge fields with data from Tips for Feedback.EPSA.DMPA.xlsx. If you see the fields but not the data, select Preview Results.

- In the ribbon, in the Preview Results group, use the arrows to navigate through the results to verify that the correct data is displayed for each participant.

- If Microsoft Outlook isn't open, open it now.
- In Microsoft Word ➡ Mailings, select Finish & Merge ➡ Send Email Messages.

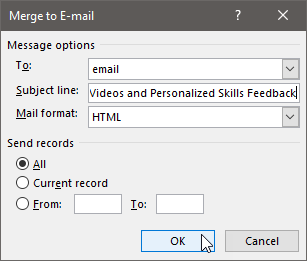
- In the Merge to E-Mail dialog box, in the To field, select email. In the Subject line, type EPS Anywhere Videos and Personalized Skills Feedback or Delivering Memorable Presentations Anywhere Videos and Personalized Skills Feedback (depending on the program). In the Mail format field, select HTML. In the Send records area, select All. Select OK.
- Wait for Microsoft Word to complete the mailmerge.
- Open Microsoft Outlook and the Sent Items folder.
- Verify that Microsoft Outlook sent an email to each participant.
- Save and close Tips for Feedback.EPSA.DMPA.xlsx.
Did you find it helpful?
Yes
No
Send feedback Sorry we couldn't be helpful. Help us improve this article with your feedback.


